This article describes the Auto-Schedule feature in Meisterplan, which automatically organizes the chronological order of future projects such that they can be finished in the shortest possible time.
- Required User Rights
- How Auto-Schedule Works
- Auto-Scheduling a Single Project
- Auto-Scheduling Several Projects
- Auto-Scheduling All Projects Above the Cut-Off Line
- Auto-Scheduling All Selected Projects
- Auto-Scheduling Downstream From Selected Project
- Auto-Scheduling Information
- Undo Auto-Scheduling
Required User Rights
- To use auto-schedule for a single project, you need the Change Project Schedule right.
- To use auto-schedule for more than one project, in addition you need the Auto-Schedule Multiple Projects right.
How Auto-Schedule Works
Only projects that have not yet started and are within the currently selected Date Range will be considered for auto-scheduling.
Auto-Schedule is done with respect to the following constraints:
- Rank
- Milestone dependencies above and below the Cut-Off line
- Role and resource capacities as defined by their calendars and the overallocation threshold
After auto-scheduling, each project for which this was possible will be at the earliest possible position where milestone dependencies are met and no overallocation of roles and resources occurs. The algorithm will also try to preserve the ranking, such that higher ranked projects start earlier. Project segments may be moved individually to resolve overallocation.
Auto-Scheduling a Single Project
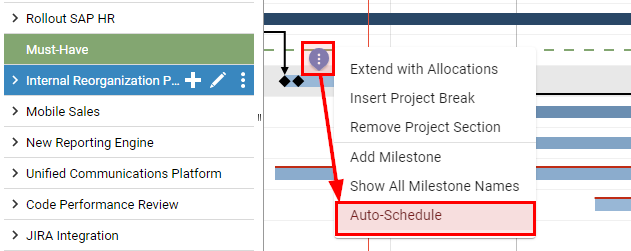
You can have Meisterplan try to find a better position for a single project: Hover over the project bar of the selected project and click the three dots to open the project context menu. Select Auto-Schedule:

If a better project position can be found, the project will be moved accordingly.
Auto-Scheduling Several Projects
You can auto-schedule multiple projects by selecting Auto-Schedule from the More Actions menu in the toolbar.
When you do, depending on the project selection, auto-scheduling will be done for ...
- ... all projects above the cut-off line (no project selected).
- ... all selected projects (multiple projects selected).
- ... the selected project and all projects between this and the cut-off line (one project selected).
Auto-Scheduling All Projects Above the Cut-Off Line
To auto-schedule all projects above the cut-off line, proceed as follows:
- Undo any current project selection by clicking anywhere else in the Gantt view.
- Open the More Actions menu in the toolbar and select the Auto-Schedule option.
All projects above the cut-off line will be auto-scheduled.
Auto-Scheduling All Selected Projects
To auto-schedule selected projects, proceed as follows:
- Select all projects you wish to auto-schedule. To select multiple projects, hold [Ctrl] while clicking the projects you wish to select or hold [SHIFT] and click the first and then the last project you wish to select.
- Open the More Actions menu in the toolbar and select the Auto-Schedule option.
- Select the Schedule Selected Projects option.
All selected projects will be auto-scheduled.
Auto-Scheduling Downstream From Selected Project
To auto-schedule a selected project and all projects between that project and the Cut-Off line, proceed as follows:
- Select the first project to auto-schedule.
- Open the More Actions menu in the toolbar and select the Auto-Schedule option.
- Select the Downstream Schedule option.
The selected project and all projects between it and the cut-off line will be auto-scheduled.
Auto-Scheduling Information
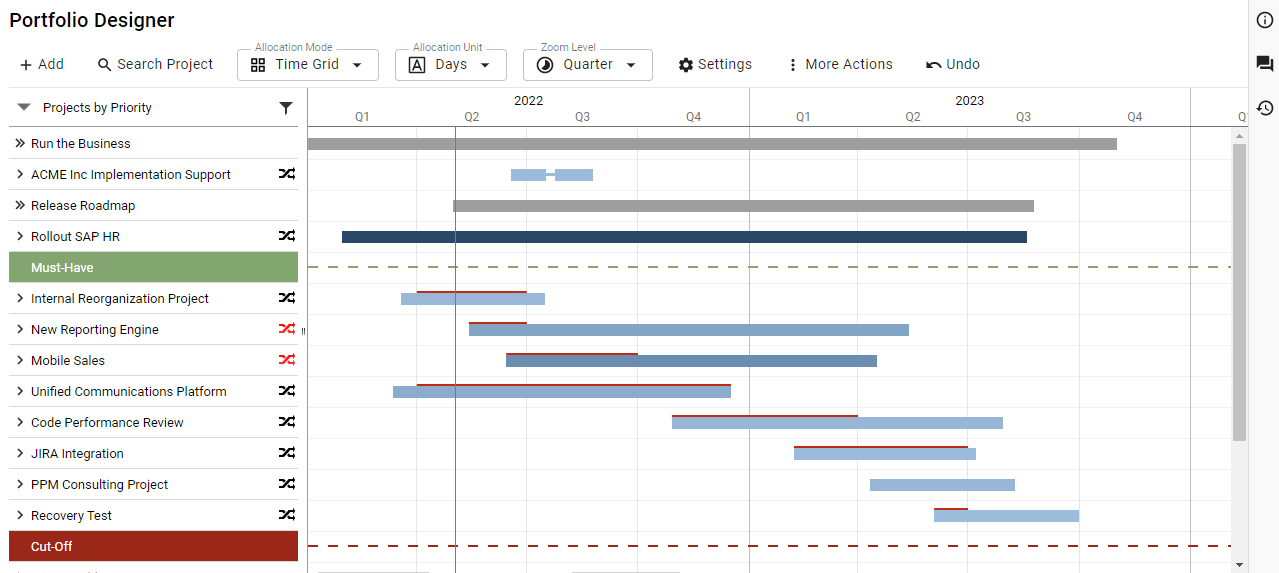
After auto-scheduling, the header of each project that was processed will display an icon indicating that the project was auto-scheduled.
The icon color and hints display which projects were moved and which could not be moved by auto-scheduling:
- Black: Project was not touched by auto-scheduling because no better position could be found.
- Green: Project was moved to a better position by auto-scheduling.
- Red: Project could not be moved to a better position due to unsolvable overallocation.
Undo Auto-Scheduling
Each auto-scheduling process in Meisterplan can be undone. To do this, click the Undo button in the toolbar of the Portfolio Designer view.


